

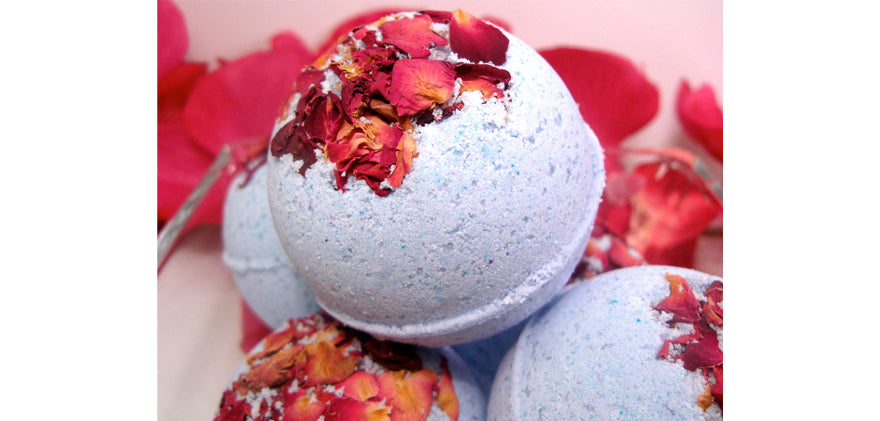
Rose + Lavender + Oatmeal Bath Bombs
Natural bath bombs are fun to use - like taking a bath in champagne! - and surprisingly easy to make. Making a small batch of these babies should only take up to half and hour so they're a great project for those who don't have a lot of time.
Because bath bombs dissolve or fizz in bath water, this recipe uses generously floral essential oils to ensure the most luxurious bathtub experience. Use any dried floral and botanical elements, or glitter for decoration, and add a secret cache of petals inside your bombs for extra colour and texture when floating in the tub.
We've included quick oats in the recipe as oatmeal turns bath water milky and silky - which is fantastic for soothing dry or irritated skin.
Because bath bombs fizz and disintegrate when wet - make sure to keep working, drying surface, and ingredients as dry as possible.1/2 cup Citric Acid 1 cup Baking Soda 1/4 cup Quick oats Lavender Essential Oil Rose Geranium Essential Oil Dried Botanicals - Lavender Buds + Rose Petals Witch Hazel - in a spray bottle Bath Bomb Mold / baking mold
1. Sift all dry ingredients - Citric Acid, Baking Soda, Quick Oats - until clump free into a bowl. 2. Drizzle in your essential oils and mix everything together. Don't be afraid to get your hands dirty! Using your hands ensures adequate mixing and allows you to find and break up any clumps to make sure the oils and fragrance is evenly dispersed. 3. Spray your mixture with Witch Hazel until a damp consistency. Ideally the mixture should hold form when you form it into a ball with your hands. 4. Fill bottom of mold with your choice of decoration (flowers buds/petals/glitter) for decoration. Next, pack mold half way. Use your fingers to gently carve out a small hallow in what will be the center of your bath bomb. Fill this with additional buds/petals/glitter. Fill the remainder of the mold with bath bomb mix. Gently compress. 5. Let bombs sit in mold for 5-10 minutes. Gently tap the bombs out of molds and set on a soft surface to dry. Depending on size, bath bombs can take anywhere from 12-24 hours to completely dry.
Once dry - pop bombs into the bath for fizzy and fragrant relaxation!
 Homemade Aromatherapy Bath Salts
Add to your bath bomb infused bathtub with these soothing aromatic bath salts. The crystallized mineral compounds gently exfoliate your skin and smooth rough patches.
The great thing about homemade bath salts is that you can use customize or combine any scent you want. Like bath bombs, these homemade salts are cheap and easy to create and make for great personalized gifts.
Remember to keep work space and ingredients as dry as possible!
3 cups of salt - Sea Salt, Dead Sea Salt, Himalayan Pink Salt, Epsom Salt...etc 1 cup Baking Soda Dried Botanicals Essential Oil / Essential Oil Blend JoJoba Oil / Fractionated Coconut Oil for moisturization (optional) Soap Colorant (optional)
Floral Blend Rosewood Essential Oil Sandalwood Essential Oil Lavender Essential Oil Rose Petals - dried Lavender Petals - dried
Woods Blend Fir Essential Oil Cedar Essential Oil Frankincense Essential Oil Lapsong Souchong Tea Juniper Berries - dried Pine Needles - finely chopped
Citrus Blend Lime Essential Oil Lemongrass Essential Oil Grapefruit Essential Oil Safflower Petals Hibiscus Petals - dried Lemon Peel - dried Orange Peel - dried

1. In a food processor/blender blend salt, baking soda, and essential oils until uniform in texture. You can also add in optional ingredients such as JoJoba oil and/or colorant.
For the most natural bath salts - leave salts uncoloured. Some salts such as Himalayan Pink Salts, and Black Sea Salt are naturally colourful. Mixing them together or with plain sea salt creates a beautiful speckled effect. If you would like to add colour to your salts, do so only a drop at a time and make sure to stir in completely. Using too much dye can discolour your skin, so only add in so much as to turn salts into a pastel shade of the colour you desire.2. Transfer mixture into a large bowl. Add in botanical elements (dried flower buds/petals) you have selected and various other salts you wish to include. Stir until completed mixed.
Salts differ in grain size, and combining multiple grain sizes makes for a more visually appealing salt mixture - but beware! Larger salt grains look prettier, but take longer to dissolve in bath water. For a gentler exfoliation use smaller sized salts. 3. For best results, store salts in air tight glass containers for a few days to allow time for herbs and essential oils to infuse the salts with their aromas. Once completely saturated - store salts in airtight glass containers to ensure dryness.To use as bath salts: Add 1/2-1 cup of Aromatherapy Bath Salts under warm running bath water. Mix well into bath water, ensuring salts have completely dissolved into bath water before entering - as sitting on unresolved salts can be uncomfortable. Soak for 20 minutes and let the rich minerals absorb through the skin.
To use as an exfoliator: Mix 2 tablespoons of Aromatherapy Bath Salts with a handful of your favourite body wash. Gently massage mixture onto skin to slough away dry patches, revealing a healthier looking complexion.

Pink Lemonade + Lotion Bars
If you love natural products and have dry skin this DIY is just for you.
This delicious citrus lotion bars smell so fresh and summery and look pretty too. We decided to do a double layer bar for more colour, but you can also create a cool marble effect using different colourants.
Alternatively, if you wish to make soap instead of lotion bars, you can melt down premade soap mix - goats milk/shea butter/glycerin - instead of using beeswax and oils.
 2 x 1/5 of a 1lb bar of Beeswax 2 x 1/2 cup Almond Oil 2 x 1/2 cup Coconut Oil Essential Oils - scent Lemon Peel Zest / Glitter Soap Colorant Rubbing Alcohol + spray bottle Soap Mold / heat resistant baking mold
First Layer: 1. Melt down beeswax in a double broiler (in a bowl on top of a saucepan of boiling water). 2. Add coconut oil and stir until completely melted. Add in almond oil and mix well. 3. Add in scent (optional) and pink soap colorant - stir well. 4. Pour your lotion mix into your soap mold - but only half way. 5. Once mold is half filled spray the top of the layer with rubbing alcohol to remove any air bubbles from your bars. Let layer harden overnight.
Second Layer: 6. Melt down beeswax in a double broiler (bowl on top of a saucepan of boiling water). Add coconut oil and stir until completely melted. Add in almond oil and mix well. 7. Add in lemon peel zest or glitter, citrus scent (optional), and yellow colorant (optional). 8. Spray the first layer again with alcohol and pour second mixture on top to fill the mold. Spray top of second layer with alcohol to remove air bubbles. 9. Once bars have hardened remove from molds.
To use: Rub a bar between your hands to warm it up a bit and use where needed. It's great dry skin like knees and elbows, or anywhere else you may have dry skin. It can also be used as a lip moisturizer.
 Package nicely or use for yourself in the tub! Enjoy!
Work With Us
Use this text to share information about your brand with your customers. Describe a product, share announcements, or welcome customers to your store.
Read more